My bed is just a mattress without a frame or headboard of any sort. For awhile now I've been discussing with my parents a way to actually have a headboard. I've been eyeing Pottery Barn's Raleigh Upholstered Camelback Bed particularly for the neutral color and studs around the trim. The bed happens to be $1,399, but all of us agreed we'd go with the DIY approach since my Dad is an awesome handyman. Here's the step by step tutorial on how we saved $1279 by making our own headboard.
Materials
2 yd Suede Fabric
2 yd Foam
72" Batting
6' Plywood
120 Designer Studs
Wire Rod
Measuring Tape
Pencil
Jigsaw
Table Saw
Sander
Electric Meat Cutter
Staple Gun
Hammer
Plier
Step 1: Measure the width of the bed (6 ft. for this Queen Bed.) Mark the center of the board. Use a green wiring rod to create half the "camelback"stencil for plywood. Cut out stencil with jigsaw. Flip it over and trace on other side.
Step 2: Use a jigsaw to cut along the line created by the stencil.
Step 3: Sand down the edges so it's safe to sleep near.
Step 4: Hold up foam next to cut out. Staple to top and bottom so it stays. Use a meat cutter (one of Grandmama's old tricks since the meat cutter only cuts the foam) and cut the foam along the plywood.
It should start to look like this.
Step 5: Wrap the batting over the foam headboard. Stable it around without damaging the foam. Cut the excess batting away.
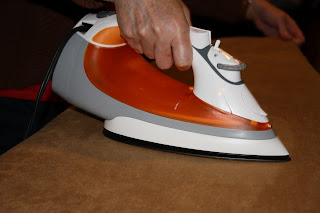
Step 6: Iron the fabric (Thanks Mom.) Drape the fabric over the frame. Staple below the foam so the fabric is tight.
Step 7: Measure out each inch and mark it along the border of the frame. Hammer in each stud on each mark with a plier.
Here's how the nailhead border should look like in the end.
The finished project in my room.
I actually love the headboard we made a lot better than the expensive Pottery Barn headboard since mine is an awesome camel suede.
Sweet Dreams are made of these!
Shannon
P.S. I am well aware that my comforter is from Twilight. I actually did not know it was when I first got it.


that is so awesome!
ReplyDeleteThat's so neat! and that's hilarious that it's the same comforter from Twilight ;D
ReplyDeleteShannon it looks great!!! I should have you make me one too :)
ReplyDelete