
One of the assignments for my Educational Psychology class was to come up with a dream lesson (that used teaching strategies from three theorists) and teach the lesson to the class. My partner and I decided that we would do tie-dye. We set off in search of a tie-dye kit all around Chestertown, but no such luck. Roses (K-mart's sad cousin) and Wallgreens did not have any. We were so dead set on tie-dying so we knew there must be another way to tie dye. That's when the power of Pinterest came into play and we found a different tie-dying technique, using rubbing alcohol and sharpies. We'd never tried it before but we were sure going to learn that night.
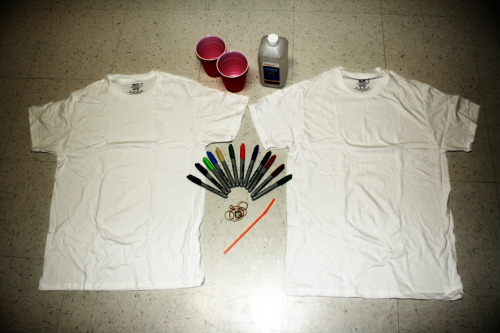
Materials
White T-Shirt
Rubbing Alcohol
Straws (or any sort of dropper)
Plastic Cups
Rubber Bands
Colored Sharpies
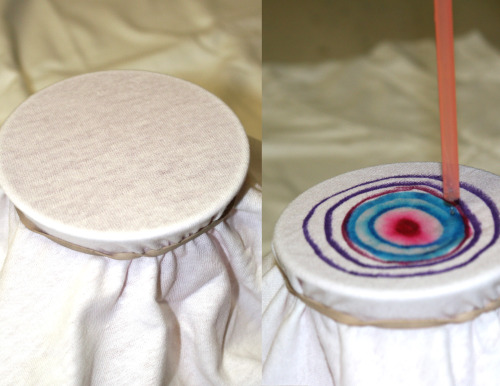
Step 1
Lay shirt out flat and pick a spot. Place cup under shirt. Secure rubber band around rim of cup, holding
shirt in place.
Step 2
Draw a design on the stretched fabric and drop rubbing alcohol over design.
The rubbing alcohol will expand and the colors will blend together to give it the tie-dye feel.

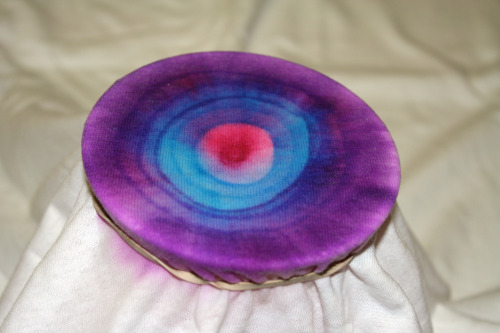
Step 4
Repeat until you are happy with your shirt. Don’t forget to let it dry before you wear it!
And voila, you're very own tie-dye'd shirt. Full of different colors, designs and patterns made with things you can find around your house.
Shannon
No comments:
Post a Comment